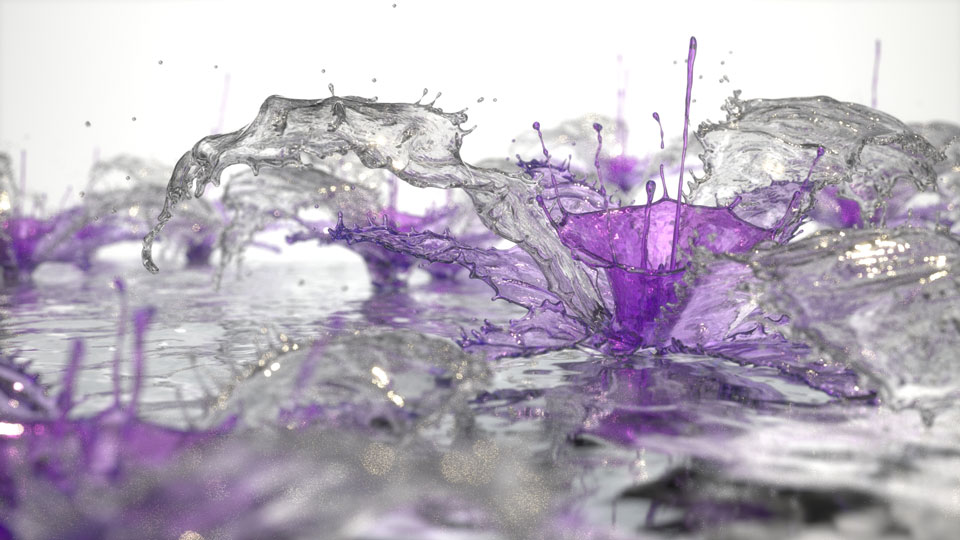
RealFlow & Smorganic – a marriage made in cg heaven!
 Fluid elements we created for a Renuage Brandy spot. When we create generic elements for our clients, it gives them multiple options to develop the look they want.
When Trizz (Barcelona) approached Fusion with concept art for a Renuage Brandy tvc, we could see the need for our ‘‘smorganic’© tool written all over it! The spot was beautifully conceived by creative director Oriol Puig, very dramatic and moody, demanding gorgeous, thin, delicate splashes and highly art-directed, complex performances from cg fluids. The cg splashes needed forces applied so the fluid would behave very specifically while still looking sensuous and natural. Even the tendrils and droplets off the delicate splash work had to comply with specific art-direction. Fusion’s fx team was very excited by the challenge as we have developed a number of in-house tools here, like our ‘‘smorganic’©, that are ideal for this kind of detailed, complex work. Smorganic© : http://www.fusioncis.com/pr_smorganic.html
Before we really get into the case study, have a look at the finished director’s cut from Trizz’s Vimeo channel. http://vimeo.com/57160763
While the concept was unique and inviting, the practical parameters of schedule and budget were not. As is more and more common in vfx these days, tremendously complex work is expected on very limited timelines and budgets… but that’s a whole other article! The schedule allowed only 4 weeks to deliver 18 challenging fluid elements. Fortunately however, we’ve done enough fluid projects that Fusion’s VFX Supervisor Mark Stasiuk was able to determine that each of the 18 elements bore at least some slight resemblance to elements we had done for past projects, giving us advanced starting points so we would at least be able to get out fairly quick first versions after doing some rapid adaptation. The team at Trizz were very helpful in that regard, because they knew there were a lot of shots, a lot of elements, to be created. They were happy to take Fusion’s elements and see how they could be manipulated, layered into shots, re-used as background elements, as well as to alter camera to extract the best possible shot from the element. In most cases Fusion was able to create elements that Trizz’s creative director Oriol Puig was happy with after 10 or fewer internal sim versions, which in the world of simulation fx is definitely on the low end.
In this detailed case study, we’ll go thru each of the elements to illustrate 1)methodology, 2) the creative and technical process of artistic fluid simulation, and 3) we’ll show the full length versions of some of these beautiful digital creations. We like to think of them as dynamic sculptures!
A wip of the vanilla flower in the Renuage spot, created from several of Fusion’s fluid elements along with lighting fx done in post.
In all these simulations, Fusion applied its proprietary suite of ‘‘smorganic’© tools — the toolset that inspired Next Limit to develop their broadly similar tool called the “sheeter daemon”. The concept behind these tools is simple; it’s used to fill-in undesirable gaps (swiss-cheese holes) that develop in the particle cloud which prevent the user from creating the classic sheeted mid-air splashes that we’re all so used to seeing as reference for our simulation work.
Fusion’s toolset has been continually evolving since we created ‘‘smorganic’© in 2009, giving us added control on many aspects of art-directed splashes. We can set dynamic thresholds on when the fluids are allowed to break apart, what parts of them break apart, and the character of the break-up. We’re able to generate not only smooth, infinitely stable un-broken sheets of fluid but also ‘paint on’ regions at their margins where narrow tendrils are generated, and ‘paint on’ areas where fluid break-up starts. Some of these tools were first introduced in our work with Shilo (NYC) on their beautifully creative Valspar paint project — and you can see a case study on that here in this blog, see the menu on the right.
For the Renuage project, we brought together a wide variety of simulation setups from past projects that were broadly similar to what was needed, did rapid adaptation of the sim setups, flow shapes and guiding forces, upgraded the ‘smorganic’© code to the most evolved version, and then added custom scripts where needed to gain additional control to meet Trizz’s art direction as best we could in the time available.
There are 2 key steps to getting going on a shot’s fluid sim work, which are especially important in these kinds of high concept projects. First, you have to spend some time “boiling down” the needs of the shots, stripping away all the tiny details and layers that are desired, to finally understand the core, base element that is needed as the centerpiece. Very often it’s hard to understand what the most important element is — it’s size, shape and behavior. Usually you can safely over-simplify it to some extent at least as a starting point, for example by visualizing it with some basic proxy geometry. It’s important not to jump right into trying simulations before understanding what’s really needed, otherwise you can waste a lot of time on details that turn out to be unimportant.
Once you’ve got a good idea of what the shot needs in its simplest form, you move naturally to step 2 — develop the simplest possible version of the simulation setup, or method. Figure out what is the simplest way to make the fluid behave like you need it to. Simple is very important, because as the work progresses and we need to get more and more details and art-direction into the element, the complexity of the sim always increases. If you start off with a complex sim, it very quickly becomes so complex that it is unmanageable and the time to revise your elements goes thru the roof. In sims like those in the Renuage project, we usually start off with just some interacting geometry, an emitter, and 2 or 3 forces — usually some combination of drag, gravity and noise.
OK so let’s now look thru the Renuage simulations…
The Droplet Sequence…
 The drop sequence, showing the droplet shooting over the fluid surface, generating a splashy wake.
The first major sequence of the spot we called the “Droplet” sequence because it followed a single droplet coming out of a splash of brandy. To do this, Oriol and Mark decided on a workflow that would not over-constrain the fluid behavior but still give ample opportunity for specific art direction. Fusion developed a specific kind of splash meant to feel like the end part of a small ocean wave crashing on a beach but well after the initial violent crash, and more toward the part where the surge of water from the wave is turbulently flooding up the beach and over the top of the water from the previous wave. Once the splash element was done, the Trizz team then selected a point in the splash and animated a sphere representing the hero droplet as tho it was arising from the splash, coming up thru the splash. They handed this animation back to Fusion, and we coated the droplet geo in fluid particles and meshed it together with the splash simulation to create a seamless element.
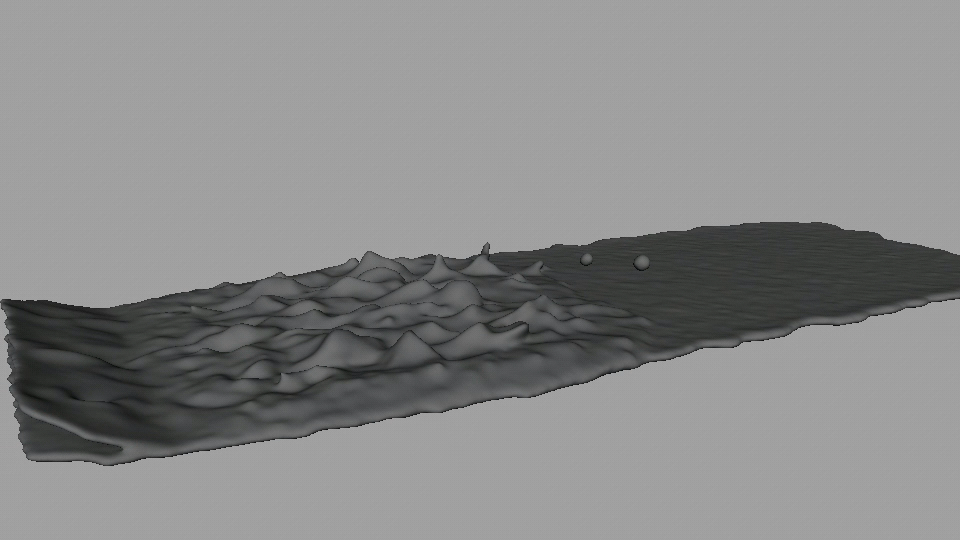 Final mesh of the drop sequence, showing the flat splashing element and the droplets just after emerging.
Now back to the splash. At first this element sounds a little complicated but we boiled it down to creating 2 fluid emission rigs that would generate slightly noisy sheets of fluid, and simply shoot one at the other to create the turbulence and interaction. A playblast of the final sim shows the rigs in our setup: www.fusioncis.com/press/renuage/dropseq_splash_particles.mov
[hana-flv-player video=”http://fusioncis.com/wp-content/uploads/2013/03/dropseq_splash_particles1.flv” width=”640″ description=”” player=”5″ autoload=”true” autoplay=”false” loop=”false” autorewind=”true” /]
At first glance this would seem to lack any way of really generating the needed fluid turbulence, but we knew it would work because of a few past projects — the Epic Mickey game trailer project where we worked with Zoic (http://www.fusioncis.com/press/EpicMickey_H264_720x405.mov ), and also the Beckham Plunge fragrance project where we worked with ReelFX/Radium (http://www.fusioncis.com/press/beckhamplunge/beckhamplunge.mov ).
For the Beckham spot in particular, we generated a very interesting, turbulent splash by simply dropping a layer of fluid onto another layer of fluid. The turbulent feeling to the splash motion comes from the particle-particle interactions, much like you’d expect from dropping a sheet of marbles onto a floor covered in marbles. If you dropped the marbles straight onto the floor, they’d mostly bounce straight back up. But if they hit other marbles, they’ll bounce off in a wild variety of directions. Doing that with ‘smorganic’© turned on so the fluid doesn’t break apart, and you get the sorts of contorted shapes you are wanting.
The only challenge then was controlling the violence of the splashing. The simplest single parameter was just how fast we shot the one fluid toward the other. This of course changed the speed of the action but we could dial that back and forth using the fps of the simulation.
You can see in our particle playblast that we use a very particular fluid emission rig, consisting of a sort of “scoop” of smooth geometry to guide the fluid, plus a bounded drag force to calm the fluid down as it hits the scoop and usually another force, say a bounded gravity or a d-spline, to squash the fluid against the scoop. This rig creates a smooth fluid sheet. This basic concept of having a fluid emission source rig is something we use in almost all our sims to get “nice” fluid as it enters our shots. It’s something we’d encourage all sim artists to do since the “raw” fluid particle cloud as it comes out of the emitter, is always a fairly sparse set of particles with limited particle-particle interaction. This is done on purpose so the fluid will emit stably, but it does not make for nice looking emission. So we apply some kind of rig to push the particles against each other in some sensible way for the shot.
You can see the end result fluid element here after Trizz hand-animated the hero droplet and handed by the animation for us to coat the geo and re-mesh:
[hana-flv-player video=”http://fusioncis.com/wp-content/uploads/2013/03/dropseq.flv” width=”640″ description=”” player=”5″ autoload=”true” autoplay=”false” loop=”false” autorewind=”true” /]
For the next shot, there’s a change in camera to a side view to show the hero droplet flying over the surface of the fluid and generating a splashy wake, a little like you’d expect from the air turbulence of a fighter jet flying low over the water. The concept in the commercial is that this brandy has some serious power, like an energy aura.
Initially we tried creating a custom (scripted) force field to generate the splash wake but that turned out to be a little tougher to do than expected, and it was clearly going to take some extra effort to get it working. While we mulled the problem, Oriol did some creative thinking using the accumulating library of elements they were getting from us on other shots, and found that placing 2 copies of our splash elements from the Vanilla Flower sequence (see next section) on their sides and partially submerged below the flat surface of fluid, created a look approaching what he wanted. He showed us and that got us going on a new and simpler track.
Final mesh of the wake elements for the drop sequence, showing a view from the rear of the wake showing their wing-like, curving forms.
So armed with that concept, Fusion adapted the splash sim setup from the Vanilla Flower sequence to create 2 customized splashes for the droplet wake. We adjusted the behavior of the tendrils more to Oriol’s liking, and also added a scripted force that would bend the splash over as it got higher from the fluid plane, the goal being to have the 2 splashes making up the wake, and have them spread out wing-like to give the wake a more interesting character. The scripted force field is the kind of thing we often use to get that little extra control for sculpting fluids. It often takes just a few minutes to create — consisting in this case of less than 20 lines of Python code — but gives you absolute control on the distribution of forces. We usually find that the native force daemons, altho tremendously useful in a lot of situations and always the first thing we try, just don’t have sufficient control on the fall-off of their forces to meet the needs of highly art-directed elements. You can see a playblast of the meshes for the final versions of these elements here:
[hana-flv-player video=”http://fusioncis.com/wp-content/uploads/2013/03/dropseq_wakesplash.flv” width=”640″ description=”” player=”5″ autoload=”true” autoplay=”false” loop=”false” autorewind=”true” /]
The Vanilla Flower Sequence…
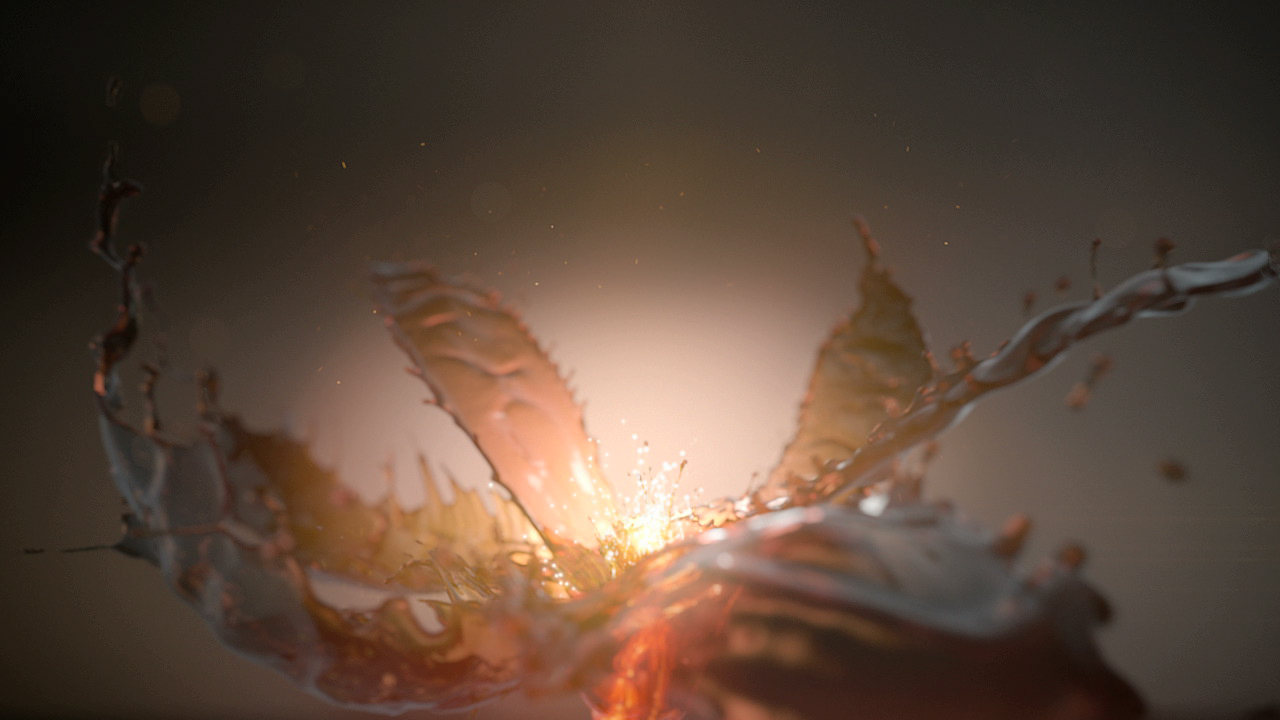 Another view of the vanilla flower created from a group of fluid elements along with some lighting fx done in post.
In this sequence the idea was to create a splash that resembled a vanilla flower, from which (eventually) springs another hero droplet. Fusion has done lots of fluid morphing on projects in the past but in this case Trizz’s CD Oriol Puig wanted a more abstract look rather than a literal morph. This is a great example of bringing together a number of relatively simple fluid elements to create a highly complex, detailed look, and is our favourite part of the commercial.
Here’s a playblast of the particles from the final versions of the sims all put together into approximately the vanilla flower configuration to illustrate the concept:
[hana-flv-player video=”http://fusioncis.com/wp-content/uploads/2013/03/vanillaflower_particles.flv” width=”640″ description=”” player=”5″ autoload=”true” autoplay=”false” loop=”false” autorewind=”true” /]
And here’s a playblast of the meshes showing something closer to what was used in the commercial:
[hana-flv-player video=”http://fusioncis.com/wp-content/uploads/2013/03/vanillaflower.flv” width=”640″ description=”” player=”5″ autoload=”true” autoplay=”false” loop=”false” autorewind=”true” /]
First, for the flower petals Oriol wanted a few separate splashes to make up the petals and the action needed to feel a little like the flower was opening. For this we fell back to our mid-air splash rig, which was described in the previous section and has been developed over many projects, with settings and experience really developed thru Zoic’s Epic Mickey project where we generated hundreds of “throws” of paint with all sorts of shapes. In this case we created not so much “throws” of fluid as fountains, shooting up and arching over under the influence of simple gravity.
The 2 key aspects to making these elements feel natural was to get the marginal tendrils feeling right (number, spacing, length, thickness), and to get the right level of noisiness in the emission. It’s crucial when making mid-air throws of fluid that you really do nothing to them after they’ve launched, except maybe pull them down with gravity and maybe a tiny amount of noise. Any other significant force makes them immediately feel unnatural and defeats the whole exercise.
What that means is you have to get the fluid launch conditions just right to get what you want downstream. You have to launch off tendrils of just the right size and vigor at the point of the launch, and you have to wiggle the scoop and pulse the emission just enough to add a pleasing, not overly chaotic irregularity to the flow. Since you aren’t applying any other forces downstream, and the fluid has momentum, any irregularity you introduce in the fluid at the launch point continues to grow throughout the sim. So there’s a very carefully determined zone of settings that give you the right sort of natural, attractive irregularity while maintaining form and structure, and if you wander out of that zone you get….well basically you get a big mess.
In the center of all this splash activity, Oriol needed to have a little crown splash and a little pillar of fluid rising up out of it, with which a descending droplet would collide. We broke these out into separate elements for added control.
For the crown splash, at the time of the project we actually had relatively few options. By the way, by “crown splash” I mean the classic tiny splashes you get when a droplet of fluid falls onto a calm pool surface and generates a crown-shaped, thin-walled splash whose rim emanates a set of little tendrils. We had in our methods library a nice crown splash setup (http://www.fusioncis.com/research/splashes/ ), but that setup is quite simple and limited in control, and also in its resulting splash, and doesn’t incorporate our more evolved version of ‘smorganic’©, nor does it allow for those all-important tendrils.
Fortunately, in this case, we could get away without seeing the origin of the splash, so we used an adapted version of our splash rig to generate the crown by using a hemisphere as the guiding geo instead of the scoop, and emitting into the bottom of the hemisphere so the fluid would shoot up the walls and out the open top. We then painted on tendril locations along the leading edge of the splash and we had a nice, if highly simplified, crown splash. Worked into the shot with all the other layers of splashes and 2D fx, this worked well even if it it isn’t as realistic as we’d like to have created. But it’s a good example of how a simplified method can work well for a shot and really help you out when the schedule is short.
The fact that we didn’t really have as good a crown splash method as we would’ve liked, and the fact that we keep getting asked to do these kinds of splashes (!), put the heat under our team to start developing a better crown splash method. This is actually in progress even as we write this case study; you can see an example of where we’re at here:
[hana-flv-player video=”http://fusioncis.com/wp-content/uploads/2013/03/crownsplash_gen2_36a.flv” width=”640″ description=”” player=”5″ autoload=”true” autoplay=”false” loop=”false” autorewind=”true” /]
We’ll follow up with another case study on crown splashes once that r&d is further along!
The last element for this sequence was the “pillar impact”, where an upward moving pillar of fluid gets hit by a downward moving droplet. The idea here was to reproduce the look where there is a stream of descending droplets in a line, each droplet generating a crown splash, and each crown splash ends with a “back splash” where a little, single pillar of fluid comes up, just in time for the next falling droplet to hit it.
Again this sounds pretty complicated, but we had already done something a little bit similar working with Shilo on the Valspar paint project, mentioned earlier. In fact in this case, because we only had to generate a natural reaction to the collision, the element could be made much simpler than the Valspar element where the resulting splash was sculpted into a spinning sort of umbrella of fluid. See commercial: http://www.fusioncis.com/press/Valspar_halfHD.mov
[hana-flv-player video=”http://fusioncis.com/wp-content/uploads/2013/03/Valspar_halfHD.flv” width=”640″ description=”” player=”5″ autoload=”true” autoplay=”false” loop=”false” autorewind=”true” /]
For this element, we created an upward moving pillar of high surface tension fluid by simply emitting from a circle emitter and squeezing the fluid gently with a d-spline right after emission. We created a descending droplet directly above the pillar with a sphere emitter and simply let them hit each other, and with ‘smorganic’© turned on the result was a sort of mushroom-shaped splash very similar to what happens in nature. You see this element especially well in the particle playblast of the elements, linked to above.
The Walnut Sequence…
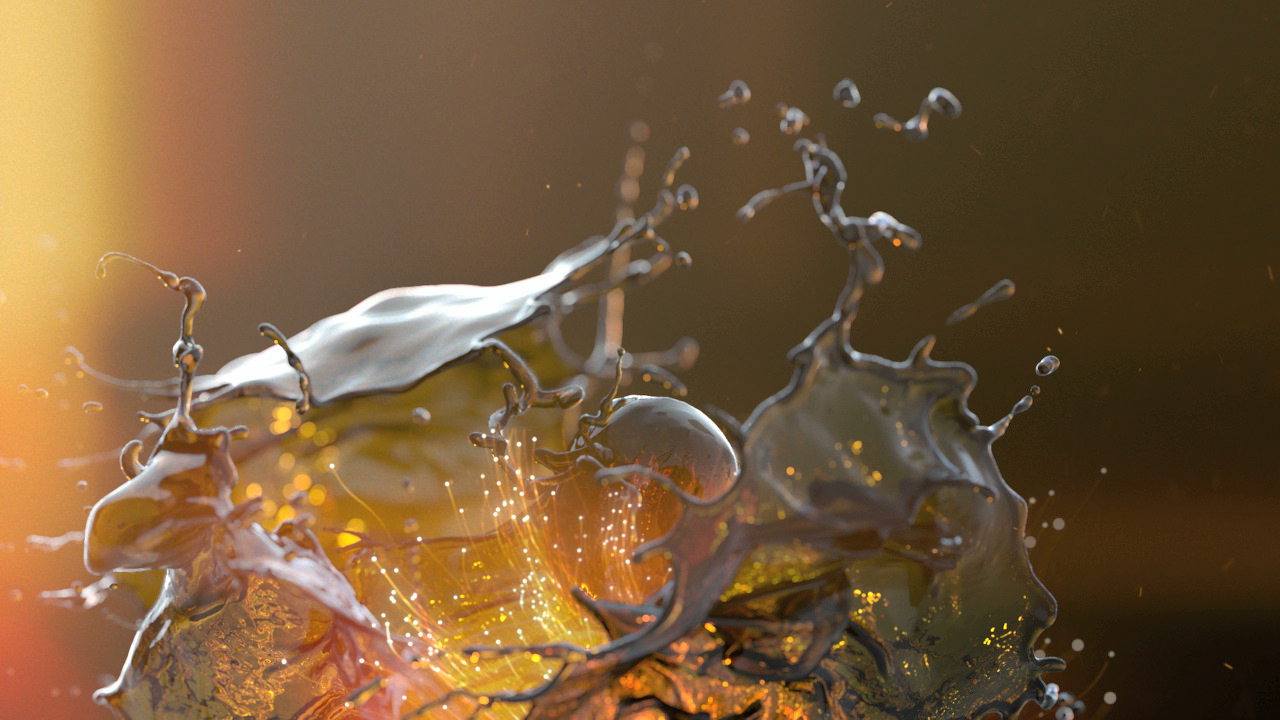 The bursting-style splash of the walnut sequence, another cluster of independently-generated fluid elements.
The walnut sequence is another example of simulating elements separately and bringing them together to make them look like a single coherent element. In this sequence a sort of bursting splash happens, and from its center appears a droplet that is shaped like a walnut. Here’s a playblast showing the meshes of all the final elements, put together in the approximate configuration to illustrate the concept:
[hana-flv-player video=”http://fusioncis.com/wp-content/uploads/2013/03/walnut.flv” width=”640″ description=”” player=”5″ autoload=”true” autoplay=”false” loop=”false” autorewind=”true” /]
The first set of elements, for the “burst”, were sets of splashes done similarly to the vanilla flower petal splashes, but with a different shape to feel like they were more explosive and also enclosing something (the walnut). For these we were able to fairly simply adapt the vanilla flower simulation setup, which gave us quick results.
The inner burst element was designed to be something more like the crown splash of the vanilla flower, but to spread out and open up a bit trumpet-like. For this one we adapted our setup for the vanilla flower’s crown splash and added a scripted daemon that acted as a repulsor in the center of the crown and allowed us to carefully control the falloff of the repulsion force so we could sculpt the form of the trumpet-like section.
For the next 3 elements, the Trizz team provided us with the animated geometry of the walnut. As the walnut appears, it had to look like it was a sort of bulge on the end of a tendril of splashing fluid, so in the frames prior to the shot starting we pushed the walnut’s geometry into a little container of fluid, made the geometry sticky, and then as the walnut animated up and away the fluid simply stuck to it. With ‘smorganic’© on, we could keep the tendril continuous and unbroken until we wanted it to break away and release the walnut.
For the walnut itself, we started by using the coating / morphing technology we developed originally for our Whole Water project with The Department of Motion Graphics (New Zealand) (http://fusioncis.com/projects/television/whole-water/ ) and then evolved to a more advanced functionality in our Frey Chocolate projects with Asylum (Santa Monica) (http://fusioncis.com/projects/television/frey-chocolate/ ). This technology is conceptually simple but quite challenging to implement. Basically we run a calculation that tightly “fits” fluid onto the polys of an object, so the first challenge is calculating that fit for each and every polygon no matter the aspect ratio of the triangular face. Once a fluid particle has its place on the geometry, we calculate axes on each poly face and record each particle’s position in poly face space, and stick each particle to its assigned position so the geometry can be animated and can even deform significantly without breaking the fluid coating. In this case there was only slight deformation, but mostly what we had to do was get very high detail definition in the fluid coating because the walnut has a finely wrinkled surface. That simply meant getting the fit of the fluid coating very tight, using very high res fluid.
The fluid walnut, made of a sim that coats the walnut geo meshed together with a sim of fluid streaming and dripping off the walnut geo.
The final touch was an element of dripping fluid from the walnut. The walnut just being a fluid coating on the walnut geo wouldn’t read as a fluid shaped like a walnut, but rather would look like a not very well defined walnut. This is simply because the fluid making the shape isn’t really moving in a fluidal way. If the walnut was shown actually forming from the fluid then the dripping wouldn’t be needed, but in this case when the walnut first appears, it’s already fully formed. By adding dripping fluid, we could re-establish that we’re actually looking at fluid. To do this we used our ‘streaming’ technology.
It’s interesting looking back on how these kinds of specialized technologies came about. One of the things we emphasize in our work is the adaptation of previous methods and the constant improvement of them wherever possible, which means we can keep r&d periods very short — usually a few days — but our tools are always evolving and improving. The streaming tool was actually an offshoot of our morphing technology — in this case, instead of creating an even coating of fluid over the entire surface of an object, a small fraction of polys are randomly selected on each frame during the sim to receive a coating. And instead of sticking the fluid to a particular location, once the fluid is created on the poly face it’s released (after inheriting some fraction of the poly’s motion) to slide down the geometry and stream off. Because this method was adapted from existing technology, we were able to re-use big chunks of challenging code — the calculation for fitting fluid on poly faces — and so get the streaming to work very quickly.
A simple version of the streaming technology was actually first used in our Whole Water morphing project (http://fusioncis.com/projects/television/whole-water/ ) to get extra water pouring off the morphed shapes, but it’s been continuously improved and had controls added over a long list of projects, with probably the most important ones being our work with Baked Beans of the Netherlands (http://www.fusioncis.com/press/Afsluitdijk_halfHD.mov ), our work with Zoic on the Emmy and VES nominated Once Upon a Time’s episode “The Stranger” (http://www.fusioncis.com/press/OceanSceneHD_ONC_mos.mov ) and our work with Blur on the title sequence of the Girl With The Dragon Tattoo (case study with links to clips: http://www.fusioncis.com/press/Fusion_GWDT_CaseStudy.pdf ).
The Wave Sequence…
In last shot of the commercial, revealing the product, we were tasked with creating a sort of vertical, sheeted splash of fluid that would fill frame, then break up into tiny droplets in some attractive and cool way, revealing the product bottle behind the splash.
It all sounded very simple conceptually but we knew from the outset that this would be the most challenging element to make look beautiful and elegant. Technically it’s straightforward to do, we just create a sheet of fluid that’s kept coherent using ‘smorganic’©, and then turn off ‘smorganic’© at some moment and let the fluid break up naturally. But in practice, this doesn’t get anything remotely elegant or attractive. Eventually the fluid would form little droplets but there’d be a long period between it being a sheet and droplets when it would look very ugly — like some kind of weird webbing or a sheet of swiss-cheese. Let’s call this intermediate break-up period the “webbed” zone.
We had run into this problem on a variety of previous projects where fluid had to break up and had developed a force field that would break the fluid up from specific locations that you could specify, a similar action to what you see in slow-motion footage of paint sheets flying thru the air. The best example of the use of this method was in the Valspar paint spot where we worked with Shilo. For that effect however, the break-up was pushed hard to happen fast and quite explosively, so we’d see as little of that ugly “webbed” zone as possible — for example see this WIP clip:
[hana-flv-player video=”http://fusioncis.com/wp-content/uploads/2013/04/Valspar_s040_explode.flv” width=”640″ description=”” player=”5″ autoload=”true” autoplay=”false” loop=”false” autorewind=”true” /]
In the case of the Renuage project the challenge was increased because the fluid break-up was the hero moment and everyone really wanted to see that event clearly. So, early in the project, in order to give ourselves as much time as possible for development, we implemented the Valspar fluid break-up on the Renuage splash sheet, but it just didn’t look good enough. We could see too much of the “webbed” zone. I remember having a call with the creative director Oriol Puig, who had shown his wife a WIP of the whole spot the night before and she had been really impressed with everything until it got to the very last shot, when she said something along the lines of “yuck what’s that?”. Here’s that original element in a playblast:
[hana-flv-player video=”http://fusioncis.com/wp-content/uploads/2013/03/waveseq_crown_07a.flv” width=”640″ description=”” player=”5″ autoload=”true” autoplay=”false” loop=”false” autorewind=”true” /]
We had a suspicion this would happen so we were actively pursuing a few parallel lines of development to get a different look to the break-up, trying to shorten the time when the fluid looked webbed, or remove the webbed part of the fluid:
[hana-flv-player video=”http://fusioncis.com/wp-content/uploads/2013/03/waveseq_crown_08b.flv” width=”640″ description=”” player=”5″ autoload=”true” autoplay=”false” loop=”false” autorewind=”true” /]
Or remove the webbed part but leave some tiny droplets to feel like “spritz” or “spray”:
[hana-flv-player video=”http://fusioncis.com/wp-content/uploads/2013/03/waveseq_crown_08c.flv” width=”640″ description=”” player=”5″ autoload=”true” autoplay=”false” loop=”false” autorewind=”true” /]
Or push it out of the way:
[hana-flv-player video=”http://fusioncis.com/wp-content/uploads/2013/03/waveseq_crown_11a.flv” width=”640″ description=”” player=”5″ autoload=”true” autoplay=”false” loop=”false” autorewind=”true” /]
All of which were not really attractive nor what was wanted. But could make for a cool effect in a sci-fi film!
As you might imagine from the various trials, long hours of r&d went into this problem without fully solving it, altho by the end we had worked out a “theoretical” algorithm that we think is likely to work, with the only problem that the mathematics are a little tough to implement and it’s bound to run very slowly since it’ll involve a few nested loops over the fluid particles. In the end we simply ran out of time without being able to quite get this to work as we all wanted it to, but the Trizz team came up with a solution where they just minimized how much of this fluid break-up you could see, and that worked out sufficiently well to finish the spot — using one of the earliest trials of the elements (ugh!). That’s life in fx work!
This element is a good example of how something in VFX can appear fully possible to do, and may indeed be possible to do, but if the budget doesn’t allow the artist time or the schedule is too short, it ends up being practically impossible. Often the results aren’t fully predictable even if you’re experienced with the type of effect. This is where it’s extremely important to communicate clearly the risks with your client and to nurture a relationship with them that allows for creative flexibility, so when you run into these technical challenges the group can put their heads together and make a creative change that’s tolerable to the client and evades requiring a full technical solution. We think you’ll all agree that the final version of the Renuage spot shows how beautiful the results can be despite challenges along the way.
Composing with Fluid Elements…
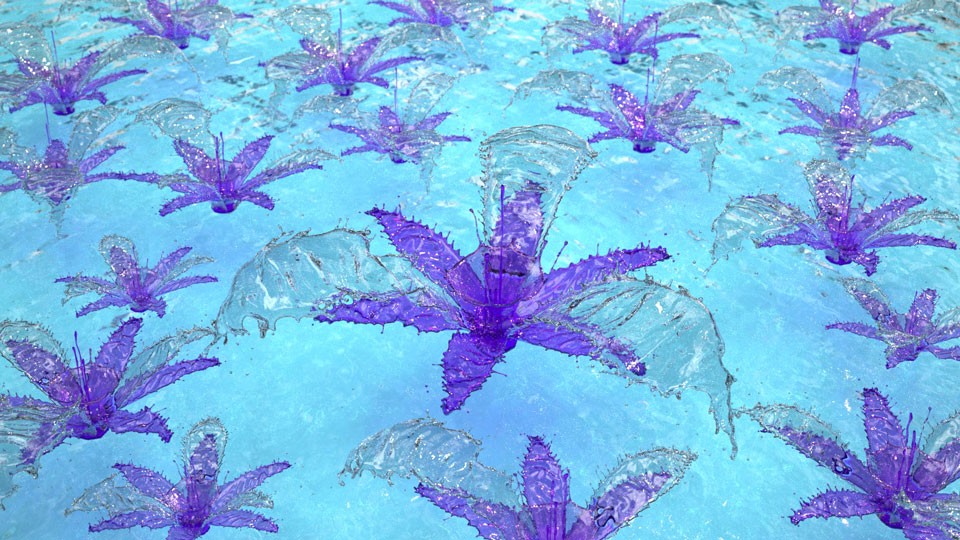
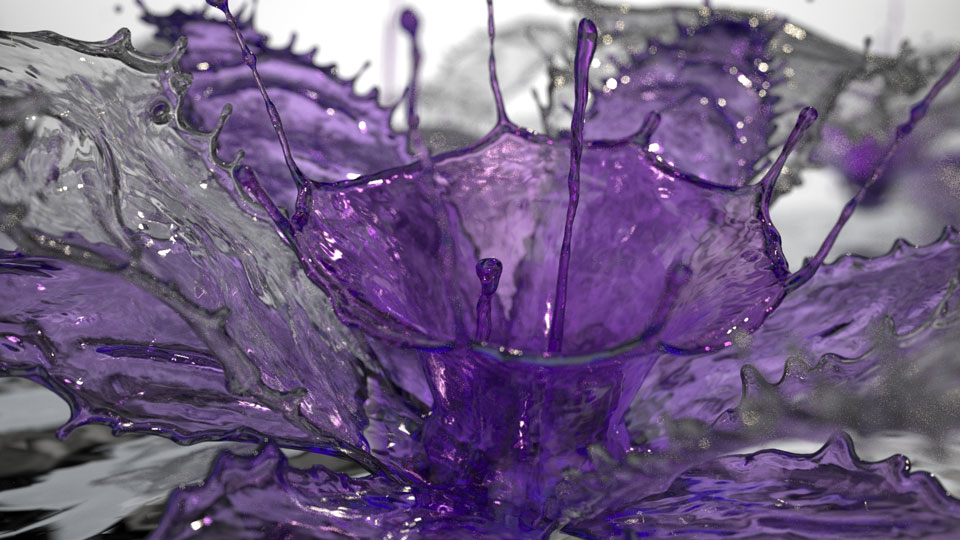 On heavily art-directed projects, one of the things we emphasize with our clients are the advantages of building up shots with independently-generated fluid sims. So basically you break up all the shapes you want in the shot into different sims, each one of which is far easier to create than doing it all in one, and then you have separate control on each part which helps tremendously with revisions and hitting creative targets. For our clients, this approach also means they can compose and re-compose elements without a need to re-sim. Over the course of a project, a library of fluid elements gets built which can be used not only in the shots in which they were intended, but also to fill out other shots with background and extreme foreground elements to add depth. The Trizz team used this approach to great advantage in the Renuage project, allowing them to build up complex shots quickly and cutting down on the total number of unique sims by a dramatic margin.
Another advantage to this “generic library” approach is that the same elements can be used not only in completely different shots, but also in completely different projects. We put some rough lighting tests together showing how flexible this approach can be, see below:
